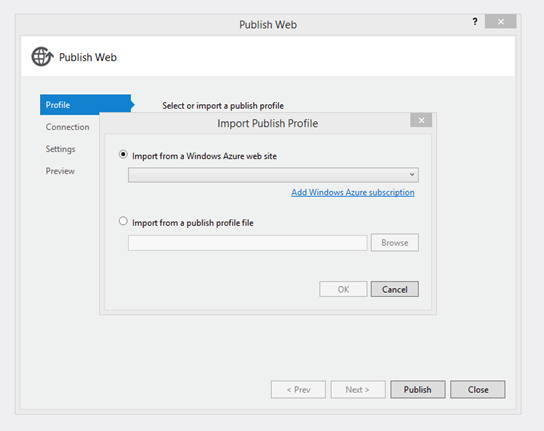
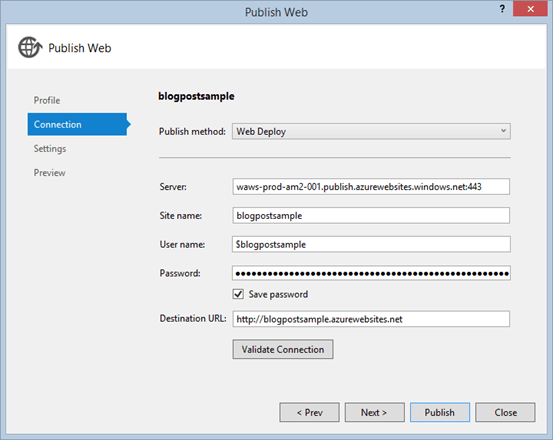
The deployment of ASP.NET applications on Azure websites in Visual Studio is pretty easy. With the new Azure SDK it is possible to import your Azure subscription and directly choose the already created Azure Website as deployment-destination:


The deployment information’s are saved in a .pubxml file in the project. It includes all information’s – besides the password.
Visual Studio saves the password somewhere else. Besides it is not a very clean process to deploy out of Visual Studio it would be a better way to have a build system build the WebDeploy package and publish the project later on a random Azure website or a local IIS.
How to publish a WebDeploy Package with an CMD?
If you use MSBuild for example to build a WebDeploy Package you will receive a Batch-file beside the main package where you can start the process.

If you run the file like this you will see a ReadMe file. Important for Azure Websites: you need a password to deploy!
How can I find the WebDeploy password for Azure Websites?
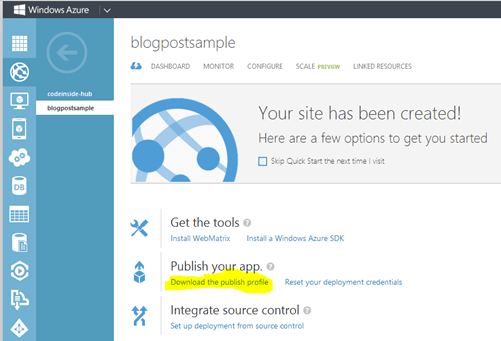
The only way I know is to download the Publishing-Profile using the Web-Management-Tool. The WebDeploy password isn’t connected to the FTP/GIT-password which can be set in addition!

This file shows the uncoded but still cryptical password:

TL;DR – the CMD order:
That’s how it looks like in my example:
WebDeployPackage.deploy.cmd /y "/m:https://waws-prod-am2-001.publish.azurewebsites.windows.net/MsDeploy.axd?Site=blogpostsample" -allowUntrusted /u:"$blogpostsample" /p:"AssmJvtBrcWqfjaoHiANseLfyLuyJ1zyMn44L8YGQNKLCA9Rd9CZesxe9ilJ" /a:Basic
You have to adapt the URL (/m:) (changes depending on the region), the site, the password (/p:) and the user (/u:). The information’s are available in the publishing-profile.
Additional you have to adapt the IIS App Name in the SetParameters.xmls file:
<?xml version="1.0" encoding="utf-8"?><parameters> <setParameter name="IIS Web Application Name" value="blogpostsample" /></parameters>
Now you should be able to deploy directly on the Azure Website with the command line without any other tools.
Source:
I’ve got the solution after reading this blogpost – I’ve already asked the question on Stackoverflow myself.