If you want to be hip at the Source Control administration you have to take a look on Git or other peripheral Source Code administrations. Git is the most celebrated agent. That the subject DVCS (peripheral version administration) will be Mainstream in the world of .NET world is a fact since the comment of Brain Harry to the next TFS (responsible for the TFS at the Microsoft Corp.):
“I’m certain that about this time, I bunch of people are asking “but, did you implement DVCS”. The answer is no, not yet. You still can’t checkin while you are offline. And you can’t do history or branch merges, etc. Certain operations do still require you to be online. You won’t get big long hangs – but rather nice error messages that tell you you need to be online. DVCS is definitely in our future and this is a step in that direction but there’s another step yet to take.”
 For this blogpost it is important, that I only started working with Git so it’s possible that some facts aren’t true. But of course you are welcome to adjust me in the comments below. If you need some more help than take a look at the help side of GitHub.
So let’s have a start….
Git – what do I need?
As client for windows I recommend msysgit. Important tool there is Git Bash. It’s possible to install a GUI but to say the true, I didn’t get how it works and the instructions are done with the Bash.
For playing around it’s a good idea to create a Repository on GitHub or Google Code (Google Code supports Git as well). I’ve created a Repository on both services and in my opinion GitHub is more elegant and offers a lot of help for beginner.
Introduction to GitHub
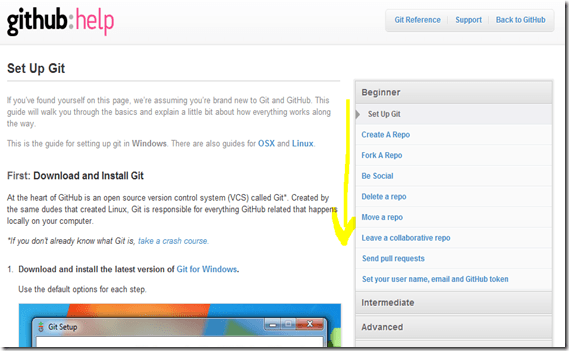
GitHub offers a great help which adopts you the subject step by step. From the setup of the client…

… to the creation of the first repositories:
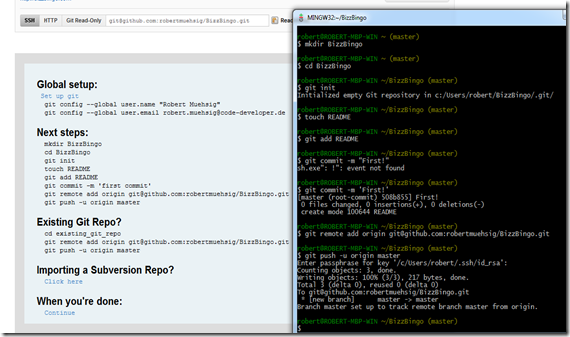
Important Initial instructions
In the last Screenshot you can see the first instructions for a first “Checkin” (in TFS language):
First you create a folder named “BizzBingo” and after that you start the initialization with “git init”.
In the folder there is a hidden “.git” folder – that’s where the mainly magic with the version administration happens. A file will be created and added via “git add.” And you da a “git commit – m ‘First’!” . Now we add it via “git remote…” to GitHub an push it at the end via “git push – u origin master”.
Now it’s visible at GitHub (in the example it’s a readme file).
Introduction at Google Code
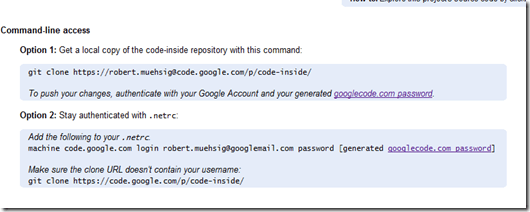
In fact it’s not that different at Google Code. Here it starts with cloning the Repository. With this the “.git” folder will be placed in the directory.

Add files
I’ve copied files into the directory. Via “git add.” All files in the directory will be added to Repository.
Now the order “git commit –m “COMMENT” appears – But be careful if you call git commit VIM appears and asks you to insert a comment:

Press “I” for the Inser-Mode and enter something now “ESC” and “:wq” I recommend you the “-m ‘Comment’” parameter.
Go on trying …
Like I’ve said before I recommend you the GitHub Help Side. If I found out something new I will let you know ![]()
Download Git Client for Windows
Create Repository on GitHub / GoogleCode
