Because if you spend a lot of time into building something stunning and you want other people in public to see this than it´s much easier for them to login with their already created Facebook login files than to register again on your site and remember another keyword.
![]()
You convinced me. What do I need?
- your own Facebook account
- an API key (look at the registration)
- in best case a library which will do most of the serious work
- 10 minutes of time
First step: get a Facebook account
Just register yourself here.
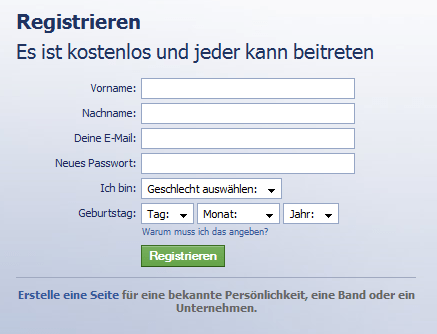
Not as hard as you thought, hum? ;)
Second step: register for the Facebook Connect / Facebook Development Account
At the bottom of the Facebook page you will found a link named "developer". Here you need to create an application. Than you need to enter a name and a URL.
Important for development: Localhost
The API keys of Facebook are mapped on a URL. In conclusion you need to fix the port in visual studio according to the web server (In my example it is 55555) or you use the IIS.
Especially with localhost there is another thing to beware if you want it to work:
Ignore the second step. I´m going to talk about this later.
Here are the two most important API keys:
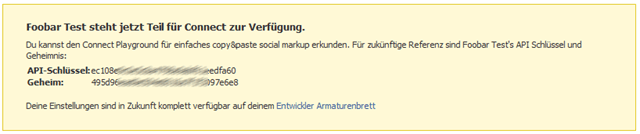
Now you are able to see your application on the "Developer dashboard".
That´s exactly where we have to go now. Here you will find all your former created applications. During the registration for the Connect service Facebook creates a "Base Domain" for you. That´s very useful if you are planning to use many different domains but it will not work with local host. So we need to edit the application:
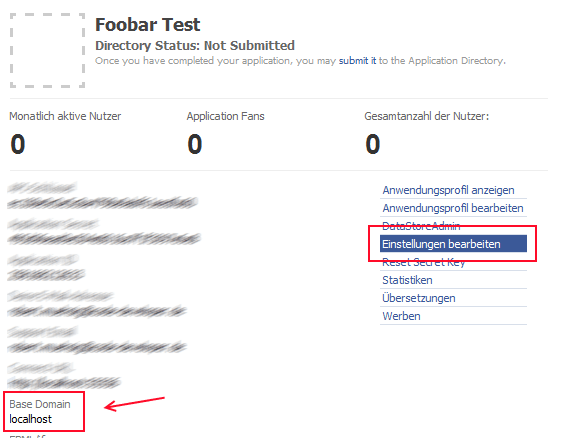
Please delete the base domain in the connect tab.
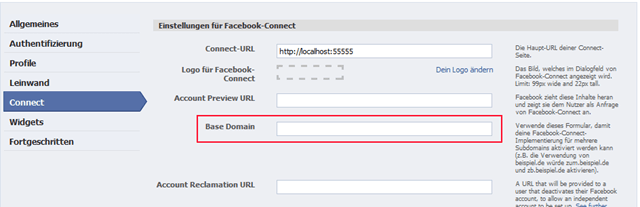
Now we are ready for developing. By the way, the fight with the base domain costs me 4 entire nights ;)
Step 3: create an ASP.NET MVC Project
Create a new ASP.NET MVC Project...
Step 4: Facebook Developer Toolkit
The Facebook Developer Toolkit is a .NET OpenSource wrapper around the REST APIs from Facebook. Microsoft supports this. Unfortunately there are several other .NET APIs but for now this is the easiest way.
We need the SDK Binaries .
Now our project should look like this:
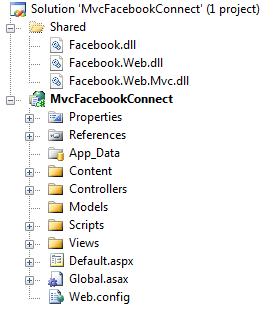
Of course we need to reference the 3 Facebook .DLLs.
Step 5: Facebook API Key + Facebook API Secret in .config
I add both the keys to the web.config.
<appSettings>
    <add key="Facebook_API_Key" value="462ab423fdc4d27XXXXXXX6a085af" />
    <add key="Facebook_API_Secret" value="641ca675f280XXXXXXXXded099"/>
  </appSettings>
Step 6: prepare the Masterpage
Now you have to include a Facebook Javascript into the Masterpage. After that you open the "init" Function with the API key and I refer to an "xdReceiver" file which will play an important role later.
<script src="http://static.ak.connect.facebook.com/js/api_lib/v0.4/FeatureLoader.js.php/de_DE" type="text/javascript"></script>
    <script type="text/javascript">FB.init("<%this.Writer.Write(ConfigurationManager.AppSettings["Facebook_API_Key"]); %>","XdReceiver");</script>
Step 7: include the Facebook Login Button into the Home/Index View
The People of Facebook created their own Markup (FBML) for Buttons, Pictures and so on. For example the Login Button looks like this:
<p>
        <fb:login-button v="2" size="medium" onlogin="window.location.reload(true);">Mit Facebook anmelden</fb:login-button>
    </p>
To keep the HTML valid you have to integrate the XML Namespace as well
<html xmlns="http://www.w3.org/1999/xhtml" xmlns:fb="http://www.facebook.com/2008/fbml">
Step 8: the XdReceiver file
That´s the file facebook already offer to us during the registration. With this file you are aloud to connect via AJAX to Facebook.
<%@ Page Language="C#" Inherits="System.Web.Mvc.ViewPage" %>
<!DOCTYPE html PUBLIC "-//W3C//DTD XHTML 1.0 Strict//EN" "http://www.w3.org/TR/xhtml1/DTD/xhtml1-strict.dtd">
<html xmlns="http://www.w3.org/1999/xhtml">
    <body>
        <script src="http://static.ak.connect.facebook.com/js/api_lib/v0.4/XdCommReceiver.js" type="text/javascript"></script>
    </body>
</html>
I stored this xdReceiver file into the home folder and I also created an xdReceiver action to render the view.
Additionally I created a "Facebook" route into Global.asx. If a User registered successfully via facebook on your homepage he will automatically send up to "Domain/xdReceiver" via DEFAULT
routes.MapRoute("Facebook",
                            "XdReceiver",
                            new {controller = "Home", action = "XdReceiver"});
Step 9: the Homecontroler
The last step is to control if the user is signed in successfully ore not.
public ActionResult Index()
{
ConnectSession session = new ConnectSession(ConfigurationManager.AppSettings["Facebook_API_Key"], ConfigurationManager.AppSettings["Facebook_API_Secret"]);
if(session.IsConnected())
{
Api facebook = new Api(session);
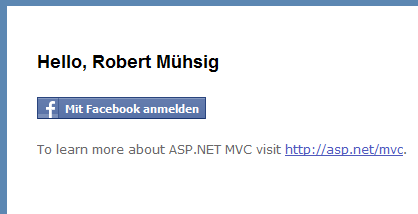
ViewData["Message"] = "Hello, " + facebook.Users.GetInfo().name;
}
else
{
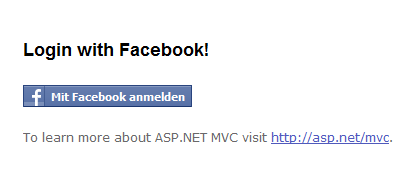
ViewData["Message"] = "Login with Facebook!";
}
return View();
}
If the user is already signed in with facebook his username will be shown. Otherwise the "Log in with facebook" sign will appear.
Result:
start Login...
*click*

*connect*
All in all it doesn´t take a lot of your time and the developer of facebook did a great job with their API. (excluded the base domain ... if you enter this, local host won´t work)
More Links: