The TFS 2015 Build System
The build system before TFS 2015 was based on a pretty arcane XAML workflow engine which was manageable, but not fun to use. With TFS 2015 a new build system was implemented, which behave pretty much the same way as other build systems (e.g. TeamCity or AppVeyor).
The “build workflow” is based on a simple “task”-concept.
There are many related topics in the TFS world, e.g. Release-Management, but this blogpost will just focus on the “Getting the system ready”-part.
TFS Build Agents
Like the other parts of Microsoft the TFS is now also in the cross-platform business. The build system in TFS 2015 is capable of building a huge range of languages. All you need is a compatible build agent.
My (simple) goal was to build a .NET application on a Windows build agent via the new TFS 2015 build system.
Step 1: Adding a new build agent
 .
.
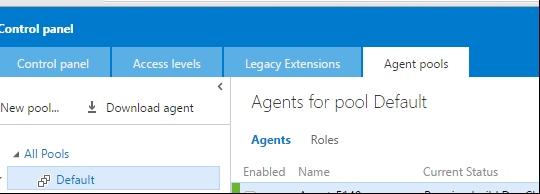
This one is maybe the hardest part. Instead of a huge TFS-Agent-Installer.msi you need to navigate inside the TFS control panel to the “Agent pool”-tab.
You need at least one pool and need to click the “Download Agent” button.
Step 2: Configure the agent
 .
.
The .zip package contains the actual build agent executable and a .cmd file.
Invoke the “ConfigureAgent.cmd”-file:
We run those agents as Windows Service (which was one of the last config-questions) and are pretty happy with the system.
Step 3: You are done
Now your new build agent should appear under the given build agent pool:
 .
.
MSDN Link
After googleing around I also found the corresponding TFS HowTo, which describes more or less the complete setup. Well… now it is documented on MSDN and this blog. Maybe this will help my future-self ;)